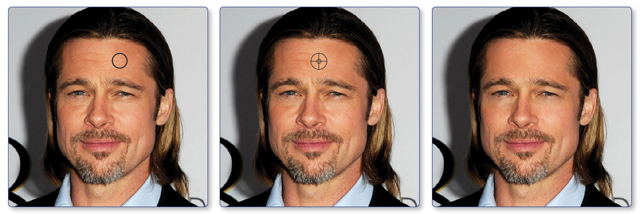
To make your brush smaller use the keyboard shortcut [
To make the brush larger, use the keyboard shortcut ]
Common Mistake with Healing Brush Tool
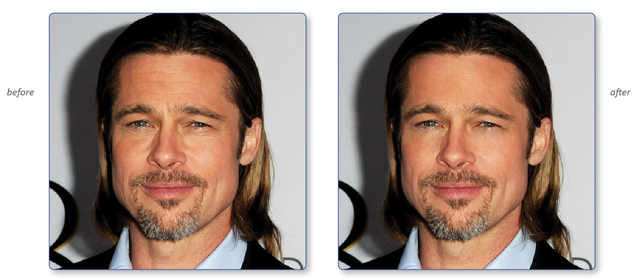
A common retouching mistake is to altogether remove all of the wrinkles from a person’s face unless you are working for a high-end fashion magazine. Wrinkles that appear too dark and noticeable, whether from lousy lighting or just lack of sleep, can detract from an otherwise great portrait.
Healing Brush Tool Isn’t Like the Spot Healing Tool
It makes you select an area of pixels that you want to copy and then decide where to paste them. This tool is excellent for retouching larger areas that require more attention to detail.
- You will find the Healing Brush tool hiding under the Spot Healing Brush tool. Select the Spot Healing Brush tool icon and hold your mouse button down until you see a new menu pop up. Go ahead and click the Healing Brush Tool from the Toolbox or Click J or Shift-J.
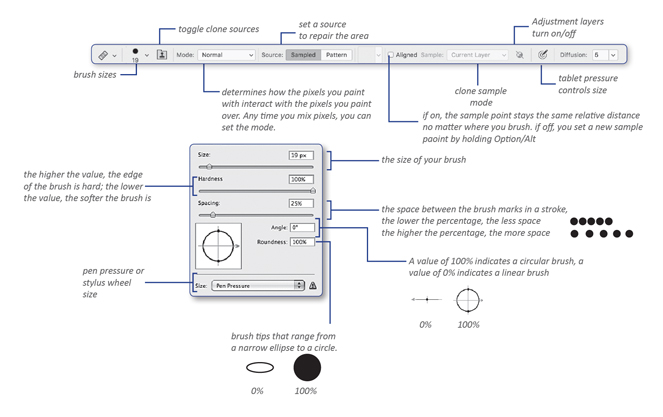
- The Healing Brush tool will show a different control panel compared to the other tools.

- After you set your brush, brush size and sample options, you are ready to select your sample area and begin healing your image.

- Modify how the healing action will affect the image, choose a mode that affects how the pixels of a layer will interact with the pixels of the layer(s) below it.
- To retouch areas with one hand-picked sample,
- a) In the Source section, select Sampled
- b) To choose the example that will cover the areas to be retouched, press Alt/Option & click the area to copy. If you forget to press Alt/Option and click, an alert may pop open ‘Option-click to define a source point to be used to repair the image.’
- c) Cover the section of the image with the copied part, drag or click the mouse. Drag the brush will begin to “repaint” the entire original image, starting with the selected sample point.
- Sometimes dragging this tool will create unfavourable results

Retouch the areas with a sample relative to the distance and angle from the source point
- a) In the Source section, decide if you want Aligning on or off. This is an on/off switch to determine the starting position of the sample point. With this option selected, the sample point stays the same relative distance from the area you’re painting—no matter where you paint. With Aligned turned off, the sample always starts at the place where you pressed Option or Alt and clicked.
- b) Select your sample area.
- c) Click the space to retouch. If not, the sample area will be drawn from the same distance and angle of the area to be retouch as it was in this initial healing sample. In other words, every new stroke continues the image started by the first stroke. Until you define a new sample area.
*Note: Drag or click the brush (Sometimes dragging this tool will create unfavourable results). When you move the brush, the sample area will also move too. The brush will stay parallel with the brush even after you release the mouse.
Check out our Healing Brush Tool video!


