So, whether you’re a beginner or an experienced designer, follow our tutorial and learn how to create a professional resume quickly and easily with InDesign. Our tutorial is perfect for students, job seekers, or professionals looking to update their resumes quickly. And with our tips and tricks, you’ll be able to streamline your workflow and create a resume that impresses potential employers.
While reviewing numerous resumes, I notice many of them look strikingly similar. This is often because individuals turn to resources like Canva, an online graphic program that offers pre-made templates for users. Unfortunately, this leads to a lack of originality and creativity as many people end up using the same templates.
Exercising Originality and Creativity
Welcome and thank you for reading this Adobe InDesign tutorial. Before diving into today’s lesson, I recommend that you view our previous tutorial on creating Paragraph Styles versus Character Styles. This knowledge will be crucial for the current lesson, as we will be using these styles to streamline our workflow process. Additionally, if you have a rough concept or a thumbnail sketch outlining how you would like to position text and other design elements, it can be incredibly beneficial. There is another post available if you require further guidance on sketching wireframes or thumbnails called “Sketch Wireframes on Paper First“.
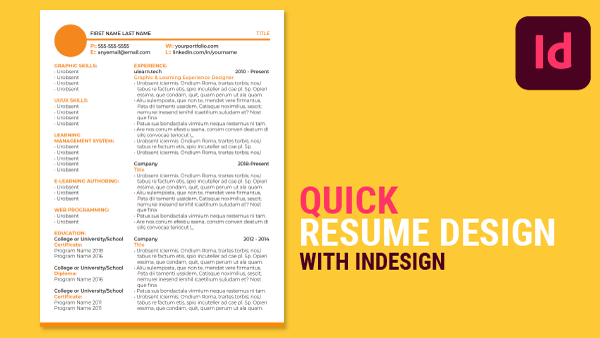
Showcase your professional experience and design skills.
Creating a one or two-page resume in Adobe InDesign is a great way to showcase your professional experience and design skills. This may vary between those who are new to creating files in InDesign and those who have been following these tutorials. Therefore, we will cover both methods to ensure everyone is up to speed.
If you already possess a document with paragraph and character styles or a file with its foundational layers, great! You can proceed to open it and begin inputting text into the document, such as your name and contact information.
Opening Existing InDesign Files or Templates
To open an existing InDesign template that you may have created with styles or foundational layers, follow these steps:
- Open Adobe InDesign.
- Click on “File” in the top menu bar.
- Select “Open” from the drop-down menu.
- Navigate to the location where the InDesign template is saved.
- Select the InDesign template file and click on “Open”.
- The InDesign template file will open with all its layers, styles, and formatting intact.
- Once the InDesign template is open, you can start editing the content and making changes to the design as needed. If you want to save the changes as a new document, select “Save As” from the “File” menu and give it a new name. This will keep the original template file intact, and you can continue to use it for future projects.
- Export your file as PDF so that the text format stays intact.
Creating a New Document or Resume
If you’re starting with no existing document, please adhere to these steps:
- To begin, launch Adobe InDesign and proceed to create a new document. When prompted, select an intent, choose “Print” and then pick the appropriate page size for your resume. In my case, I will be using the US Letter size, which is more commonly available in Canada and the United States. For those residing in Europe or Asia, the A4 paper size may be more appropriate.
- To facilitate content management, it is recommended to establish a distinct layer for text and another for graphics. A standardized approach, such as using a pre-designed template with five layers – parent pages, text, vector artwork, images, guides and grids – is highly recommended for maintaining proper organization in Adobe InDesign. This is a reliable foundation to ensure all content is arranged systematically. (For more information on how to use layers in Adobe InDesign, refer to the resource titled “How to Use Layers in Adobe InDesign“.) Or you can opt to simplify it by separating the text and graphic elements into different layers. But, we will try to keep this simple as possible.
- If you already established your paragraph or character styles that’s awesome. If not, choose a font and set the styles for your headings and body text. It’s important to choose a font that is easy to read and matches your style or personality. But as well, this will speed up the process while creating the resume.
- Add your details, such as your name, contact information, and social media handles, at the top of your resume in a prominent location. For privacy and security reasons, it’s advisable not to disclose your home address. Typically you can provide your email address, phone number, and professional social media profiles. If you wanted to, you could also mention your city, province, state, or country.
- Add sections for your work experience, education, and skills. Use bold headings or colours to separate each section.
- While it is possible to enhance your resume with graphics and icons that complement its style and emphasize your core competencies, I have chosen to keep this resume in text format only. In an upcoming video, we will provide a tutorial on incorporating images into InDesign. I advise against including a profile photo in your resume. It’s crucial to be assessed based on your skills, qualifications, and experience, rather than your physical appearance. By omitting a photo, you can ensure that attention is directed toward your professional achievements and qualifications.
- Make sure to proofread and edit your content to ensure that there are no errors. You may also want to have someone else review your resume to get a second opinion. Or at least do a spell-check.
- If you want to save the file, select “Save As” from the “File” menu and give it a new name. This will keep the file intact, and you can continue to use it for future projects.
- Export your resume as a PDF file to ensure that it maintains its text formatting and can be easily shared with others.
Overall, creating a resume in Adobe InDesign allows you to showcase your professional experience in a visually appealing way. Just make sure to balance design with readability and keep your resume clear and concise.