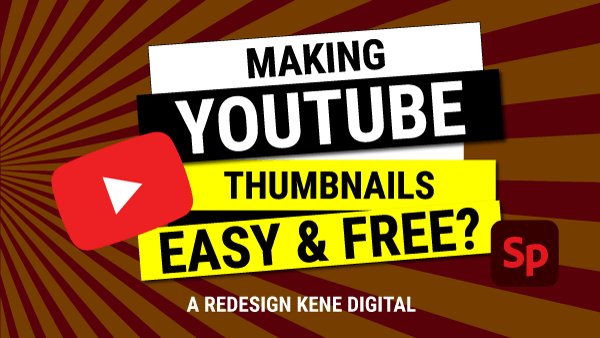
Today, we will redesign a YouTube thumbnail for Kene (pronounced I think Ken-nay) Digital. As a new YouTube creator, his thumbnails is a photo of himself with some text. Sometimes, it’s good to have a picture of yourself pointing at something or a facial expression depending on the type of video, and it can help build your brand. It truly depends on the target audience, though. When I first started, I was in my thumbnails too. Honestly, once I removed myself from the thumbnails, my subscribers, watch time, and views went up. Every channel will always be different. You can decide what works for you.
The goal of the thumbnail is to show them what you are talking about. So, if you are talking about a Ferrari, show a Ferrari and not a Beetle.
Let’s head over to Adobe Spark and log-in. If you don’t have an account, go ahead and create an account. Adobe Spark has many YouTube thumbnail templates, as you can see. Google recommends a custom thumbnail size is 1280 pixels wide by 720 pixels tall.
Either click ‘Back Home’ or click on the Spark icon to get back to the main screen. Click on Custom Size, and enter 1280 pixels wide by 720 pixels tall and click next when ready. In the top-left corner, the file name is called ‘My Post.’ Click on the pencil beside it to rename your working file.
- I am going to click on the photos icon and find free photos for a phone. The cool thing about Adobe Spark is the images are free. Some of the pictures are from royalty-free resources such as Pixabay, Unsplash and Pexels. Go through a few of them. You could go more in-depth and go directly to those websites and other resources if you wanted to, and upload them as a photo. Or, we can stay within Adobe Spark.
- I am looking for an image that shows only a phone with a non-busy background. Once you have found a photo, click on the image, and it automatically gets placed on your post.
*Please Note:
It may seem we are picking a photo and adding some text to it. And we are. Choosing that good graphic could mean more viewers clicking on the video to watching it or passing it.
Step-By-Step Process:
- I am going to close the sidebar at the top-left corner, as shown here.
- To zoom out, click on the magnify tool or use the keyboard shortcuts, Command Minus (for the Mac) or Control Minus for a PC.
- Resize the image to the full width and height as possible. I will extend the image a tad over the size, making sure no slight gaps are showing.
- Click on the text icon. And you will see different templates for the text styling. Anything with a yellow banner means premium users (so, a free account won’t have access to this). This is fine because the premium text templates are way too busy for our needs. Try to keep it simple; we only have 2-3 seconds to grab a viewer’s attention. Click on ‘Add Your Text,’ and I will use his last video title and enter that there.
- To move the text box, place your cursor or mouse on top of the text. The cursor will change to a bi-directional arrow. From here, you can move the text anywhere you want
- On the right-hand side, you can change the font, size, colour. You can also grab it by the corner of the text box to resize it as well.
- I want to emphasize the ‘New’ and ‘Smartphone’ words. To do this, I need to hit return to add a new line. The word ‘new’ and ‘smartphone’ will now stand out. Just thinking here, one could leave out the word ‘new,’ but I digress.
- Besides the alignments, I am going to click on the Circle, Grid and Magic alignments. I like the Magic one. Let’s style the text with that! As the text fits the spacing evenly from left to right, and then adjust the line spacing and height.
- We don’t have a logo for this YouTube channel. If he did, always use a high-quality image. (to learn how to place a logo, watch this clip on doing so)
- In Adobe Spark, one can go through the different enhancements, blurs, and filters to change an image is shown. This is a powerful action as some people would use Photoshop or LightRoom. Play with the effects of brightness, shadow, lighting, contrast. Each image will always be different. To apply the result, click off the effect.
- It’s time to download this thumbnail to your computer. You have the option to download this as a PDF, PNG or JPG. I am going to download this as a solid colour PNG.
- It will download into my folder, and it’s called ‘My Post.’ Now you can use this customized thumbnail for a channel.
Here everyone, if you like a YouTube thumbnail review, redesign and tutorial, let me know by watching to see how your redesign and be done.