Photoshop actions are the best
They save time and make you more productive. Actions can speed up repetitive tasks, make quick work of time-consuming edits, and give you a little creative inspiration. The Actions panel can hold as many actions as you need. It also gives you the ability to organize those actions into sets. Action sets are like file folders; they hold groups of activities. When the action is created, you can even batch your work to speed things up even faster!
For example, I took 40 screen-shots of the blending modes & layer to be printed as a part of a manual. I applied the action with the following steps in the process:
- Convert to 300 ppi
- Change the size to 2 inches
- Convert the colour mode from RGB to CMYK
- ‘Save As’ function can save into a specific folder and allow you to choose the File format
- Close the document window
To convert the other 39 images, it took less than 25 seconds to do all the pictures that I needed to re-save. If I didn’t create an action, it would take 15 minutes to fix 39 images!
- Open an image
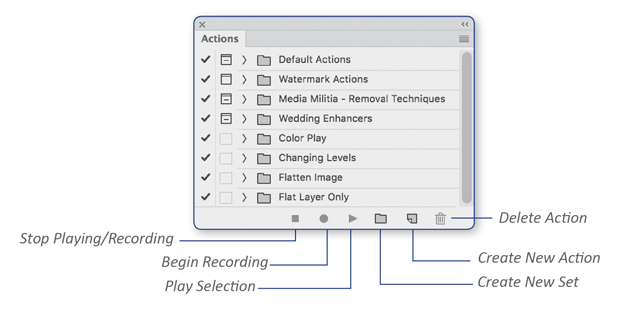
- Choose Window > Actions or if the Actions panel is on the dock, click the icon. (Alt/Option F9).
- Create a New Set of Actions by clicking the folder icon or Clicking on the Drop Down Menu in the Actions Panel
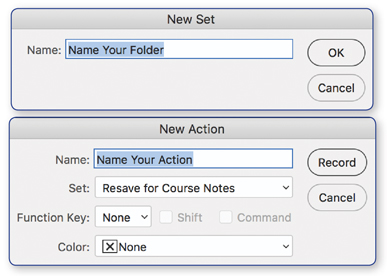
- A New Set dialogue box will open. Enter a name for the new set.
- Click, OK when finished.
- Click on the New Action icon to create your action. A New Action a dialogue box will open.

- Type in a name for your new action. You can set a Keyboard shortcut by using any of the Function Keys. When ready, click on Record.
- Now do whatever it is that you wanted to do. Perform all the tasks, clicks, option settings, and image adjustments that you want to be included in your action. Whatever action you do, it will get recorded!
- Once you’re done with the sequence, its time to stop the action. Just press the “Stop” button at the bottom left corner of the action palette and Photoshop will stop recording the activity.
- Test your action. If you mess something up or if you accidentally skip a step — don’t worry. After recording the action, you can go back, delete and edit the steps, add steps, and re-record steps.
Note: Sometimes, I find it easier to create a new action versus trying to figure out what went wrong!
Next up: Learn How to Create a Batch Process