After creating our wireframes and building our mockups in Adobe XD, we can now start to make it into a dynamic interactive prototype. What do I mean? Think of a mockup with moving actions. Creating interactive prototypes will help get design feedback and user experiences. It will also help with the final product to resemble a website.
Mockup? If Not….
We’ll first need to have our mockup built. If you like to follow along with the example shown in the video, look in our description for a sample Adobe XD file to use of the video.
You can create your designs in the design tab and create your prototypes in the prototype tab. We can enter a prototype mode by clicking from the design tab to the prototype tab at the top-left-hand corner, where you will construct and edit a prototype of your design.
Let’s Get Started to Creating Our Interactive Prototype
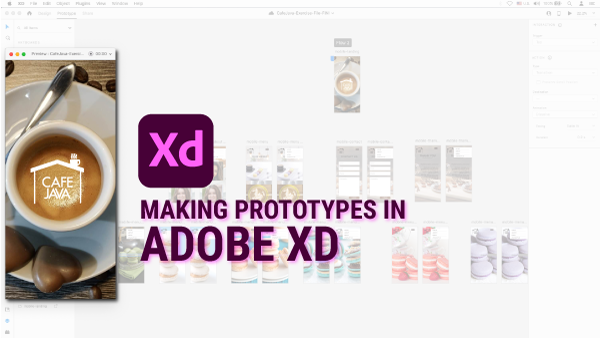
The first step in creating a prototype is determining where to start. In this example, we would like users to tap on the logo Cafe Java image, which will take us to the about page.
Do you see a blue circular node appear on the right side of the element? This indicates where a prototype connection can begin. By clicking on this node and dragging our mouse, a connection arrow appears. We can drag this connection to any top-level frame on our page except for the individual; when we release the mouse, Adobe XD will create a connection between our thumbnail element and the destination frame. We can also remove connections by clicking on the connection arrow, dragging it to an empty area on the canvas, and releasing it. Let’s go ahead and undo that since we want that connection.
First Connection in Our Prototype
For this example, once we make our first connection, a blue line with a small white arrow will appear to show our first connected frame. If you click on any frame or artboard, on the left corner is a greyed-out house. You can dictate which page should be the starting page. Click on this once, and once it turns blue will indicate the starting position of our prototype. If you want to change the starting frame, click off the blue house icon and click on a new page to start on a new frame. We’re going to leave this on the original frame since we would like that to be the starting position. Now that we’ve created a connection, let’s open the presentation view by clicking the play icon in the toolbar’s upper right corner to see it in action. This will open our prototype in a new browser tab.
Hotspots Guide to Clickable Areas
In our prototype, you’ll notice that if we hover outside over an element or page we connected earlier, a hand will flash over the picture. This is a visual indicator of a hotspot when you click on an area linked to another frame. Adobe XD will show you which hot spots are available. Hot spots help guide the user to the clickable areas.
Let’s click on our thumbnail image hotspot to see how this works. As you can see, this hotspot takes us to our frame with the enlarged image that we linked earlier. However, this frame isn’t connected to anything else, so we can’t go any further than this. Let’s return to prototype mode and continue building our connections.
The Idea: Try to Create a Working Website Prototype
Imagine if this was an actual website, and I want the user to click on specific elements to take us to those pages. On the right-hand-side panel, you can set the destination by using the drop-down menu. I sometimes think it’s much easier to click and drag to the pages, though, but either method works.
As you can see, there are many different other options, such as transitions. We will cover this in another video about prototype transitions. Let’s return to the presentation view to see our change. Without even refreshing the tab, we can see our edits reflected. If we click the arrow to dismiss the photo, we return to our starting frame.
You’ve now learned the basics of prototyping Adobe XD. in our next video; we will finish building our prototype connections and demonstrate how you can use prototyping transitions to make your prototype even more immersive.
Let’s review what we learned today. Enter prototype mode from the tab above—the properties panel drag connections from an element node to top-level frames. The start arrow and the blue box are where your prototype will begin to click the play icon to open the presentation view and a new tab.
In our next video, I am going to continue to build my prototype connections. I will speed-art up to the part of transitions.And then we will demonstrate how you can use prototyping transitions.