Are Primary Text Frames Important?
Have you ever wondered why there is a Primary Text Frame option in InDesign when you create a new document? We use primary text frames when we need to control the main text flow in a document. Typically, it is found only on parent pages. And you can only have one on a page.
So, what is primary text frames? It is a special kind of page frame used for controlling the main text flow in a document. Typically, if you have a large document with full of text like an eBook or manuscript or transcript, this will work wonders for your document file. Maybe, you only have a two-page document. And after pasting the new text into your pages, InDesign will automatically adds pages as needed, when more text is either pasted into the frame or typed.
Forgot to Create a Primary Text Frame
Here’s another way to create a primary text frame if you didn’t do it while creating a new document.
Let’s get started and create a new document. Right under Facing Pages, there is a check box for Primary Text Frame. If you have a long document such as an eBook, this would be perfect to use primary text frames. Not every file needs primary text frame. So, let’s check this on and create a document with primary text frames.
Always Double-Click on the Pages Thumbnails! Always!
Why Double-Click on the Pages Thumbnails? You might not be working on the page you selected if you select a page number. By double-clicking on the page icons in the panel, you can navigate through your document. In the panel, you will see the currently active page highlighted.
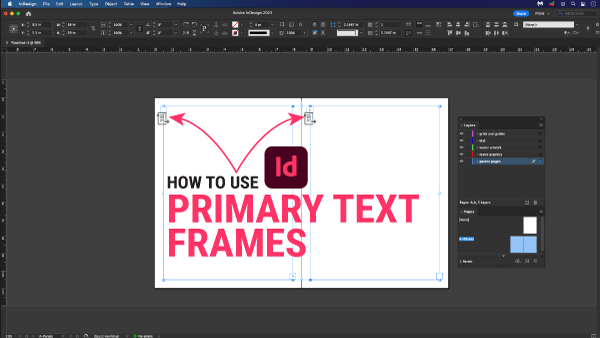
Now, double-click on the parent pages, and select the text frame. You should see an a text box icon with an arrow pointing to the right, that’s your primary text frame icon. You can also make it a regular text frame by clicking on that icon. Poof, there goes the primary text frame icon.
Filling the Primary Text Frames
Okay, so, you think you might need a primary text frame, either use the existing text frame, and click on this icon to make it a primary text frame. If by chance there isn’t a text frame box, grab the text tool and drag a text box on the parent pages. Select the Selection Tool and select the text box, the text icon will apppear and click on that to make it a primary text frame.
Select page 1 by double clicking it. We can use Greek text on page one as filler text, or lorem ipsum. Select the page with the text or selection tools and go to the Type menu. Choose Fill with placeholder text from the menu. InDesign will automatically fill the page with text. Text fills this page.
Always Name Your Layers
There is text on this layer. To get into the habit of naming my layers, I would also make an effort to call them what they are. Organize the five layers as follows: parent pages, text, raster graphics, vector artwork, and guides and grids.
Once I have created my five layers, I would use the selection tool to select the text boxes, and move this to the text layers. Although our text boxes have been moved to the text layers, the primary text frames still remain on the parent pages. Wanna test this out? Hide the text layer. If the text disappears, it worked. Did that work for you? If not, try again or let me know in the comments!