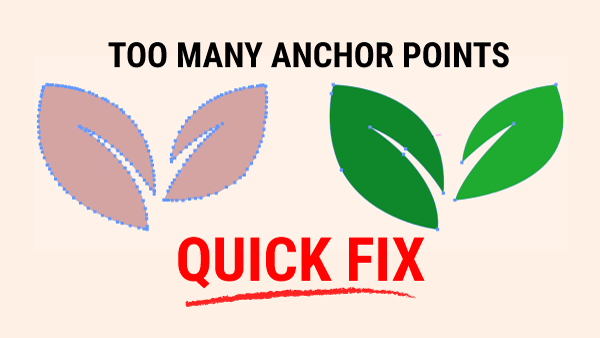
On the left, you’ll see a leaf with too many anchor points — small bumps, uneven curves, and edges that don’t feel intentional. On the right, the same leaf with fewer points and a much cleaner curve. More points usually mean more bumps. Fewer points give you a smoother, more controlled shape.
Anchor Point Tool — Fix One Point at a Time
The Anchor Point Tool is perfect when a single anchor point is causing the problem.
You can:
- Turn a smooth curve into a sharp edge
- Turn a sharp edge back into a smooth curve
- Adjust the handles to control how the entire curve flows
You’ll find it under the Pen Tool, or use the shortcut Shift + C on both Mac and PC.
Use this tool when one point is throwing off the shape.
Smooth Tool — Fix the Whole Line
The Smooth Tool works on the entire path, but only when the vector is selected first.
To access it:
- Tap N for the Pencil Tool
- Click and hold to reveal the Smooth Tool
Once active, glide over the edge of your shape.
Each pass softens bumps, removes extra anchor points, and evens out the curve.
If you want to see what you’re doing, pause your cursor off the path — the anchor points will reappear.
A small pop‑up slider may appear while smoothing. That’s the Smooth Tool Options slider.

You can ignore it, but:
- Slide right for stronger smoothing
- Slide left for lighter smoothing
Which Tool Should You Use?
Each tool solves a different problem:
- Anchor Point Tool → fix one point
- Smooth Tool → fix the whole line
Using both gives you the cleanest, most professional results.
Final Thoughts
Cleaning up paths is one of the fastest ways to improve the quality of your vector work.
Whether you’re refining a logo, smoothing a curve, or fixing a shape that “just looks off,” these two tools give you full control over your lines.
If you want a deeper dive into either tool, check out:
- Anchor Point Tool
- Smooth Tool