
If you’ve spent any time in Adobe Illustrator, you know there are usually three or four different ways to do the exact same thing. Color is no exception.
Two of the most common tools we use are the Eyedropper Tool and the Color Picker. At first glance, they seem to do the same job: they change the color of your artwork. But underneath the hood, they are built for entirely different tasks.
Once you understand the difference, choosing between them becomes automatic. Here is the quick breakdown of how they work, when to use them, and a few hidden shortcuts to speed up your workflow.
The Eyedropper Tool (Built for Copying)
The easiest way to think about the Eyedropper is as a copy-and-paste tool for styles. It doesn’t just look at color; it looks at the entire identity of an object.
When you select a vector object and click on another vector object with the Eyedropper, it copies everything:
The Fill color
The Stroke (border) color and weight
Appearance styling (like gradients, drop shadows, or transparency)
It is hands-down the fastest way to make one object look exactly like another.
*Quick Shortcut: Press I on your keyboard (on both Mac and PC) to instantly switch to the Eyedropper tool.
Working with Photos (Raster Images)
If you use the Eyedropper on a flat image—like a JPEG or a PNG—it behaves a bit differently. Because images don’t have vector strokes or gradients, the Eyedropper simply samples the exact flat pixel color you click on. That single color becomes the solid fill of your selected object.
Hidden Pro Tips for the Eyedropper:
The Stroke Modifier: By default, the Eyedropper applies color to the fill of your selected shape. If you want to apply the sampled color to the stroke instead, hold Shift while you click.
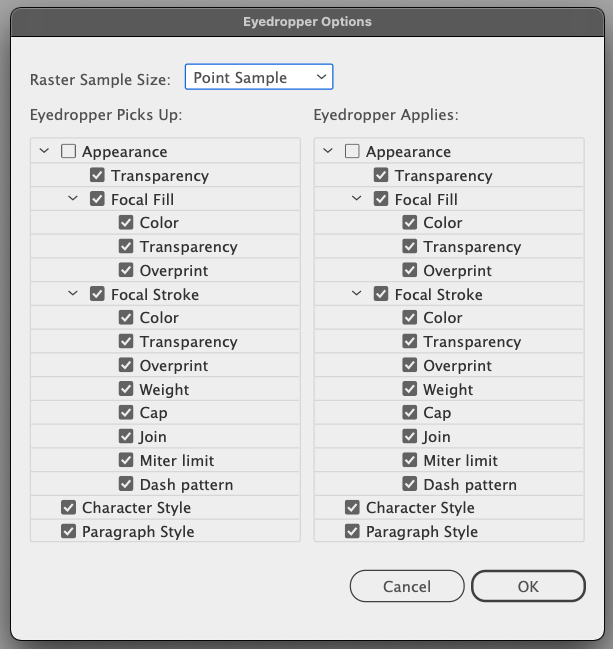
Customize What It Copies: If the Eyedropper is copying too much information (like bringing over an unwanted drop shadow), just double-click the Eyedropper icon in your toolbar. A settings panel will pop up allowing you to uncheck things like appearance or stroke, limiting it to fill only.

Eyedropper Options Dialog Box in Adobe Illustrator
The Color Picker (Built for Precision)
While the Eyedropper is all about grabbing what’s already on your screen, the Color Picker is all about manual precision. It doesn’t copy anything; it lets you define a brand-new color from scratch.
You can open the Color Picker in a few different places:
Double-clicking the Fill or Stroke box at the bottom of your main toolbar.
Double-clicking a swatch inside the Swatches panel.
Clicking the color controls inside the Color panel or the top Application Frame.
Note: Unlike the Eyedropper, Illustrator doesn’t have a default, single-key keyboard shortcut to open the Color Picker window.
When to Use It
The Color Picker is your go-to tool when you need absolute accuracy. It’s where you go to:
Type in exact HEX codes for web projects.
Input specific numeric values for RGB, CMYK, or HSB color spaces.
Make tiny, controlled adjustments to a color’s brightness or saturation using the visual slider.
If you are working with official brand guidelines or tweaking a color to make it just a little bit darker, this is the tool you need.
Summary: Which One Fits Your Workflow?
The rule of thumb is simple:
Use the Eyedropper (I) when you want to sample reference images or quickly match existing artwork.
Use the Color Picker when you need numerical precision, brand accuracy, or fine-tuned adjustments.
Both tools are essential for keeping your project moving. Do you find yourself mostly copying colors from your canvas, or are you manually typing in exact values?
Let me know in the comments below, and don’t forget to check out our other Illustrator guides to speed up your design process!